In the Audio section you must select:

- Microphone 1 is the capture card from which you intend to take the signal to send to the studio (click advanced to adjust the volume and more CONFIGURATION - AUDIO - AUDIO CARD - ADVANCED )
- Microphone 2 is the second capture card from which you intend to take the signal to send to the studio (useful for example for interviews with a second USB microphone)
- The pre-listening audio card 1 is the card from which the audio feedback from the studio will out (if you activate it)
- The pre-listening audio card 2 is the second card from which the audio feedback from the studio will out (if you activate it) (useful for example for interviews with a second USB headset)
- Monitor: it is possible to activate the audio feedback of microphone 1 or 2. For example, in the case of interviews with 2 USB microphones and 2 USB headphones, on pre-listening 1 we will turn on monitor 2 and on pre-listening 2 we will turn on monitor 1. The monitor function directs the input 1 or 2 to output 1 or 2.
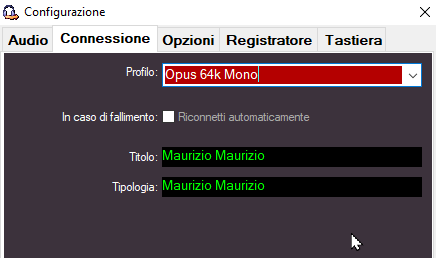
In the CONNECTION section you must choose a transmission profile, if you are inexperienced and do not know how to set the profile follow these examples:
| MAJORLY VOICE CONTENT WITH SLOW CONNECTION: | OPUS 20K Mono |
| MAJORLY VOICE CONTENT WITH MEDIUM CONNECTION: | OPUS 48K Mono |
| MAJORLY VOICE CONTENT WITH FAST CONNECTION: | OPUS 64K Mono |
| MAJORLY MUSIC CONTENT WITH CONNECTION SLOW: | OPUS 48K |
| MAJORLY MUSIC CONTENT WITH A MEDIUM CONNECTION: | OPUS 64K |
| MAJORLY MUSIC CONTENT WITH A SURELY FAST AND STABLE CONNECTION: | OPUS 96K or OPUS 128K |

- Choose whether MB LIVE should automatically reconnect if the connection drops
- In the Title and Type boxes you can enter the title and type of the program
In the KEYBOARD section:
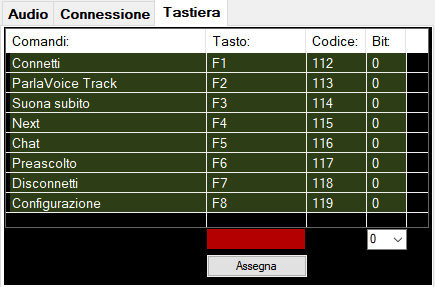
You can set some keyboard commands